
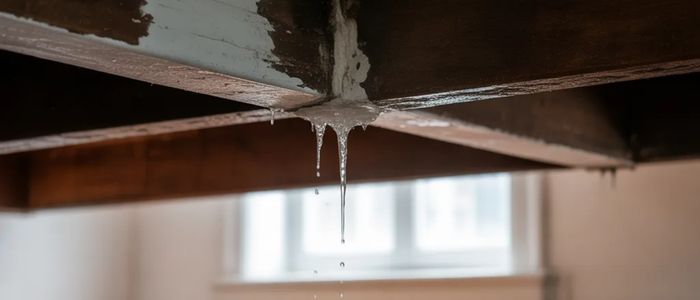
A leaking roof is more than just a minor household nuisance; it is a ticking clock that can lead to significant structural damage if left unaddressed.
Whether it is a small brown spot on your ceiling or a persistent drip during a summer thunderstorm, moisture infiltrating your home can compromise insulation, foster mold growth, and even weaken the wooden beams supporting your roof deck.
Many homeowners feel a sense of dread when they discover a leak, fearing expensive repairs and complex construction.
However, in How Do I Fix a Leaky Roof, understanding how water travels and using basic diagnostic techniques can help you manage small issues before they turn into a full-scale roof replacement.
This guide is designed to walk you through the essential steps of identifying, containing, and repairing roof leaks with professional precision, ensuring your home remains a dry and safe sanctuary for your family.
Why Identifying the Exact Source is the Greatest Challenge
Water rarely travels in a straight line once it enters your roofing system. Because of the pitch of the roof and the layers of insulation and plywood beneath the shingles, a drip appearing in your living room might actually originate from a puncture several feet away.
Gravity pulls water downward, but surface tension allows it to “run” along rafters or pipes before finally dripping onto your ceiling. To find the true source, you must look beyond the interior damage.
Inspecting your attic during a rainstorm with a high-powered flashlight is often the most effective method, as you can trace damp trails back to the entry point.
Look for “shiners” nails that missed the rafter and may frost up or drip during cold weather and also check for dark water stains on the underside of the roof sheathing. In How Do I Fix a Leaky Roof, being methodical during this inspection stage is important so you don’t just patch the symptoms instead of fixing the real cause.
Utilizing the Garden Hose Method
If the weather is dry, you can simulate rain to find a stubborn leak. While one person stays in the attic with a flashlight, another should run a garden hose over the roof in sections, starting from the bottom and working upward.
Documenting the Path of Intrusion
Once you find the entry point, mark it clearly with chalk or painter’s tape. Documenting the location both inside the attic and on the exterior surface ensures that your repair efforts are targeted and that you can provide accurate information if you later hire an expert.
Essential Safety Protocols and Preparation
- Choose the Right Conditions: Never attempt to climb onto a roof during a rainstorm, high winds, or when the surface is wet. Wait for a clear, dry day to ensure maximum traction and visibility.
- Secure Your Equipment: Always use a sturdy, extension ladder that is rated for your weight. Ensure the base is on level ground and the top extends at least three feet above the roof edge for a safe transition.
- Wear Proper Gear: Slip-resistant rubber-soled shoes are a must. Additionally, use a safety harness if you are working on a steep pitch, and wear gloves to protect your hands from sharp shingle granules and metal flashing.
- The Buddy System: Never work on a roof alone. Have a partner on the ground to steady the ladder, pass up tools, and provide assistance in the event of an accident or emergency.
- Clear the Workspace: Remove any loose debris, such as leaves or fallen branches, from the repair area. A clean surface allows for better adhesion of sealants and a clearer view of the underlying damage.
Common Causes Behind a Leaking System
Most roof leaks are the result of wear and tear on specific vulnerable components rather than a total failure of the roofing material. Damaged or missing shingles are the most frequent culprits, often caused by high winds or falling debris that strips away the protective granules.
Another major factor is the failure of flashing the thin metal strips installed around chimneys, vents, and valleys to redirect water. Over time, the sealant around these joints can crack or the metal can rust, creating a direct path for water.
Additionally, clogged gutters play a significant role; when water cannot flow freely off the roof, it backs up under the shingles, leading to rot and interior seepage.
Understanding these common failure points allows you to perform more effective preventative maintenance and targeted repairs.
Temporary Solutions to Contain Immediate Damage
When a leak occurs during a storm, your primary goal is to minimize interior damage until permanent repairs can be made. Start by clearing the area beneath the leak and placing buckets to catch dripping water.
If the ceiling is bulging, it indicates trapped water that could cause a collapse; carefully puncture the center of the bulge with a small screwdriver to release the pressure into a container.
On the exterior, a heavy-duty tarp is the best temporary shield. Secure the tarp by “sandwiching” it between wooden 2×4 boards and weighted objects, ensuring it extends over the ridge of the roof to prevent water from running underneath the plastic.
While these measures are not long-term fixes, they protect your belongings and structural integrity during the interim.
Step-by-Step DIY Repair Techniques
If you have identified a minor issue like a cracked shingle or a small hole, you can often handle the repair yourself using standard roofing materials, as explained in How Do I Fix a Leaky Roof. Start by carefully inspecting the damaged area and ensuring the roof surface is dry and safe to work on before beginning any repair work.
Inspect the roof carefully for cracked shingles, holes, or soft spots before starting repairs, ensuring the surface is dry, stable, and safe to work on.
Use a sturdy ladder and proper safety gear before climbing to prevent accidents while checking damaged areas that may be causing leaks inside the home.
Identify loose, curled, or missing shingles by looking for visible damage, lifted edges, or water stains inside the attic or ceiling spaces.
Gently lift overlapping shingles using a pry bar, taking care not to tear surrounding materials while accessing the damaged shingle section.
Remove roofing nails slowly and carefully from the damaged shingle to avoid disturbing nearby shingles or weakening the surrounding roof structure.
Slide out the broken shingle and replace it with a matching one, ensuring it fits properly and blends with the existing roof design.
Secure the new shingle using galvanized roofing nails, making sure each nail is driven straight and firmly into place for maximum hold.
Apply roofing cement over nail heads and edges to seal gaps and prevent any future water penetration under the newly installed shingle.
Inspect vent boots and flashing areas closely, as these are common weak points where leaks often develop due to weather exposure and aging.
Clean away old sealant completely before applying fresh waterproof caulk, ensuring a strong bond that keeps water from entering vulnerable roof joints.
When to Step Aside for Professional Intervention
While DIY repairs are excellent for small maintenance tasks, certain situations demand the expertise and specialized equipment of a licensed professional.
If your roof is nearing the end of its 20-to-25-year lifespan, a single leak may be a sign of widespread material failure that requires a full replacement rather than a patch.
Standard Indicators for Professional Help:
- Structural Sagging: If the roofline appears bowed or the interior rafters feel soft, the wood may be rotted.
- Multiple Leak Points: Several active leaks suggest systemic failure or significant storm damage.
- Complex Flashing Issues: Repairs around chimneys and intricate valleys require precise metalwork to be effective.
- Warranty Requirements: Many manufacturers require certified professionals to perform repairs to keep the product warranty valid.
Preventative Maintenance Checklist
Keeping your roof in top condition is the best way to avoid the stress of a leak. A proactive approach involves checking your roof twice a year ideally in the spring and fall to catch small issues before they become emergencies.
| Maintenance Task | Frequency | Purpose |
| Gutter Cleaning | Twice Yearly | Prevents water backup under shingles and fascia rot. |
| Shingle Inspection | After Major Storms | Identifies missing or cracked pieces that compromise the barrier. |
| Flashing Check | Annually | Ensures metal joints around chimneys and vents remain sealed. |
| Attic Inspection | Annually | Checks for early signs of dampness, mold, or light peeking through. |
| Tree Trimming | As Needed | Prevents branches from scraping shingles or falling on the roof. |
FAQs
How can I find a leak if I don’t see any water stains?
Look for secondary signs such as a musty odor in the attic, peeling paint near the ceiling, or mold growth on the walls. You can also inspect the roof exterior for “shiners” or damaged shingles that might be allowing small amounts of moisture to enter without causing a visible drip.
Is it safe to walk on my roof to find a leak?
- Walking on a roof can be dangerous and may damage shingles further.
- Always use a ladder and binoculars for a ground-level inspection first.
- If you must go up, wear non-slip shoes and use a safety harness.
Can I use regular caulk to fix a roof leak?
- No, standard interior caulk will not withstand UV rays and temperature swings.
- Always use specialized roofing cement or high-grade outdoor silicone.
- Ensure the product is rated for “wet application” if the area is damp.
How much does a typical roof repair cost?
The cost varies greatly depending on the extent of the damage. A simple shingle replacement or resealing a vent might cost very little in materials for a DIYer, while professional repairs for flashing or structural issues can range significantly higher based on labor and material complexity.
Final Thoughts
A leaky roof is a challenge that requires a balance of urgency and caution. By taking the time to properly diagnose the source of the water and implementing either temporary or permanent fixes, you protect your most valuable investment from the devastating effects of moisture.
Remember that while many small repairs are well within the reach of a dedicated homeowner, there is no shame in calling for professional assist
Regular maintenance remains your strongest defense, allowing you to stay ahead of the elements and extend the life of your roofing system. With the right tools, a bit of patience, and a commitment to safety, you can master the art of roof repair and keep your home dry for years to come.